Web Hosting
··3 minute readCreating a staging environment in cPanel
Please note: These are general steps you can take to create a staging sub-domain in cPanel and copy a website over to it. However, please keep in mind that there might be some extra steps we cannot cover in this guide on any changes you may need to make, that might be specific to your website or CMS (WordPress, Magento, Joomla, etc).
Create the staging/dev sub-domain
- Log in to cPanel.
- Click on Subdomains under Domains.
- Under Create a Subdomain, input the following:
- Subdomain: Input “staging” or “dev” (without the quotes)
- Domain: In the drop-down menu, choose the domain name you want to create the sub-domain for
- Document Root: This should be filled out for you if you click outside the Subdomain or Domain boxes
- Click Create.
Creating the staging/dev database and database user
Create a new database
- Log in to cPanel.
- Click on PHPMyAdmin under Databases.
- Click on the database you want to clone/copy to a new dev/staging database to the left of the page.
- Click on the Operations tab.
- Under Copy database to, input the suffix you want for the new dev staging/database (this can be “dev”, “staging” or whatever you like).
- Make sure the Structure and data option is selected bellow (there is no need to make any other changes).
- Click Go.
Create a new database user and adding it to the new database
- Log in to cPanel
- Click on MySQL Databases under Databases
- Under Add New User, input the following:
- Username: We suggest making the beginning of the username the same as the user for your live site, but add “_dev” or “_staging” at the end.
- Password: This can be anything you like, as long as it meets the strength requirement.
- Password (Again): Simply input the same password to confirm
- Click Create User
- Then, under Add User To Database
- Select the user you just created in the User drop-down menu
- Select the database you created in the Database drop-down menu
- Click Add
- Check the ALL PRIVILEGES checkbox on
- Click Make Changes
Copy the website files to the new staging/dev folder
- Log in to cPanel.
- Click on File Manager under Files.
- Navigate to the folder that your website is contained in (typically this is the public_html folder).
- Click on the top file/folder, then hold SHIFT and click on the bottom file/folder.
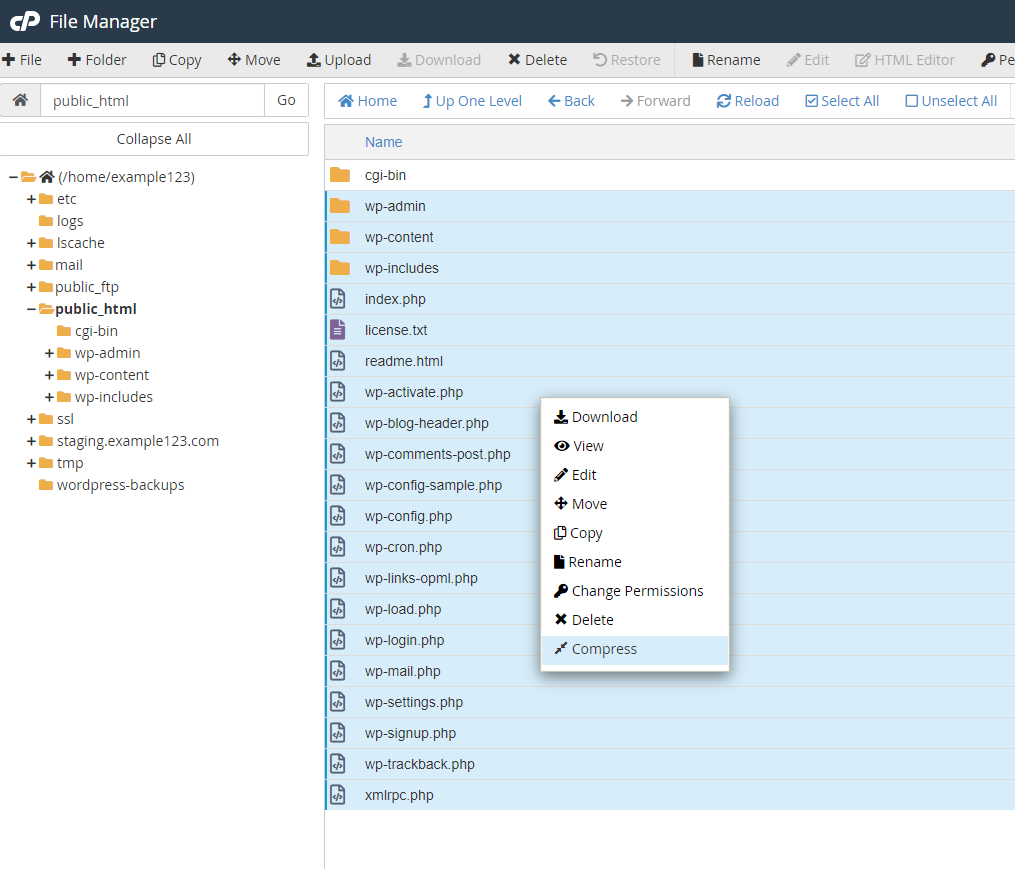
- Click Compress.
- Click Compress Files in the dialog box that appears.
- Click on and drag the compressed file to the new staging/dev folder, which you should see to the left of the File Manager interface.
- Open the folder you moved the compressed file into by clicking on it.
- Right-click on the compressed file, then click Extract.