Domain Names
··2 minute readHow to test a website using your computer's hosts file
This method involves making a small adjustment to your computer's Hosts file.
Doing this will essentially trick your computer into loading data for a requested site from the server IP address you provide in the hosts file rather than looking up where the domain points to on the internet from it’s nameservers.
Depending on your operating system, the location of your hosts file may vary which we will go into below.
CAUTION: You may not be able to access this file on a public or office computer as it will be locked down. As such this will not be an available option from such a device.
We recommend not using this on a system not owned by yourself.
 3. Go to File ? Open.
4. In the File name field, type the following, then click Open:
3. Go to File ? Open.
4. In the File name field, type the following, then click Open:
 5. Once you have added your entries to the file, navigate to File ? Save.
6.Once you have saved the file you can close the window, then visit your website in your favourite web browser.
5. Once you have added your entries to the file, navigate to File ? Save.
6.Once you have saved the file you can close the window, then visit your website in your favourite web browser.
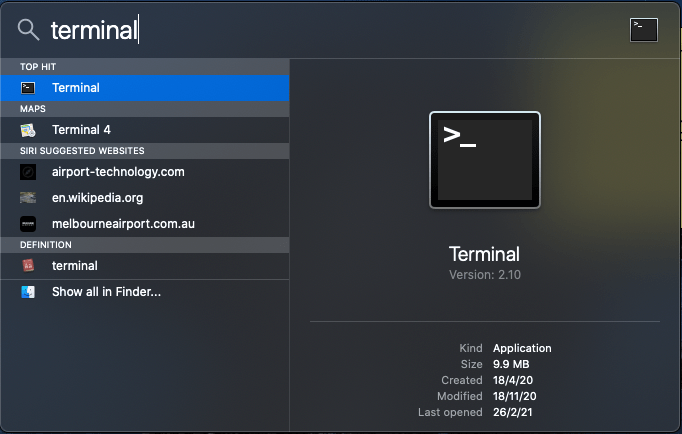
 2. Search for “Terminal” then hit Enter on your keyboard to open the application
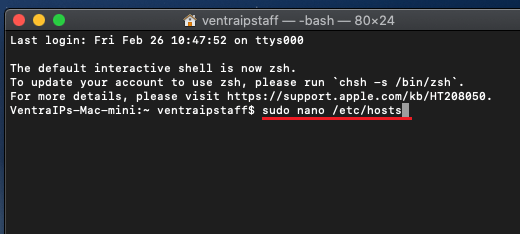
 3. When the terminal Application opens, you will need to type “sudo nano /etc/hosts” (no quotes), then hit Enter
 4. You will be prompted for your password, enter that then hit Enter again
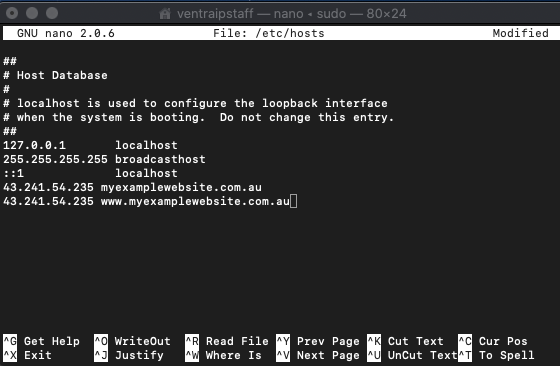
5. A text editor will open within the Terminal window. Note: The cursor can only be controlled using the UP, DOWN, LEFT, RIGHT keys on your keyboard
6. Here you will input the new hosts file entries, following the example given in this screenshot
4. You will be prompted for your password, enter that then hit Enter again
5. A text editor will open within the Terminal window. Note: The cursor can only be controlled using the UP, DOWN, LEFT, RIGHT keys on your keyboard
6. Here you will input the new hosts file entries, following the example given in this screenshot
 7. Once you have updated the file hit CTRL + O (the letter O not zero) on your keyboard, then hit Enter to save the file
8. Then hit CTRL + X to close the file
9. Once you have saved the file you can close the window, then visit your website in your favourite web browser (e.g. myexamplewebsite.com.au)
7. Once you have updated the file hit CTRL + O (the letter O not zero) on your keyboard, then hit Enter to save the file
8. Then hit CTRL + X to close the file
9. Once you have saved the file you can close the window, then visit your website in your favourite web browser (e.g. myexamplewebsite.com.au)
Windows 7, 10:
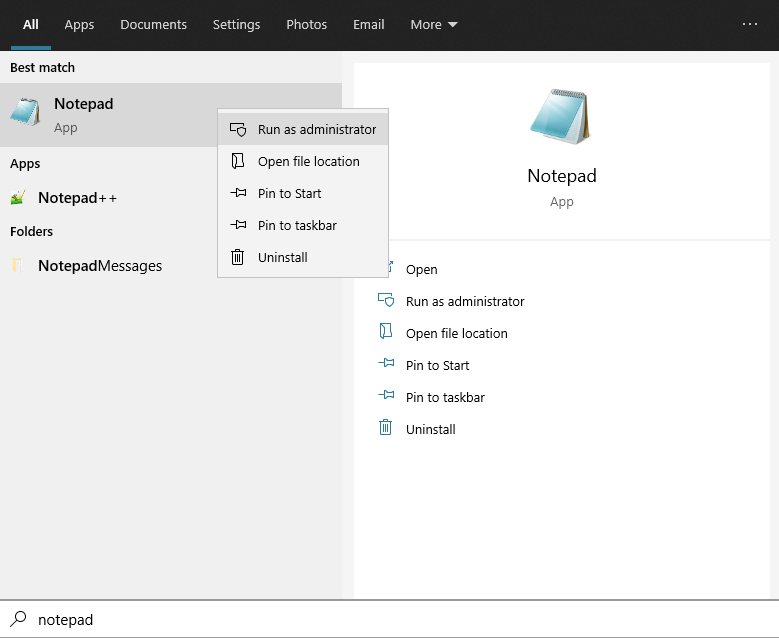
- Open the Windows Start Menu
- Type “Notepad” to search, then right-click on Notepad, then click Run as administrator.
3. Go to File ? Open.
4. In the File name field, type the following, then click Open:
C
and press OK to open the folder containing your hosts file.
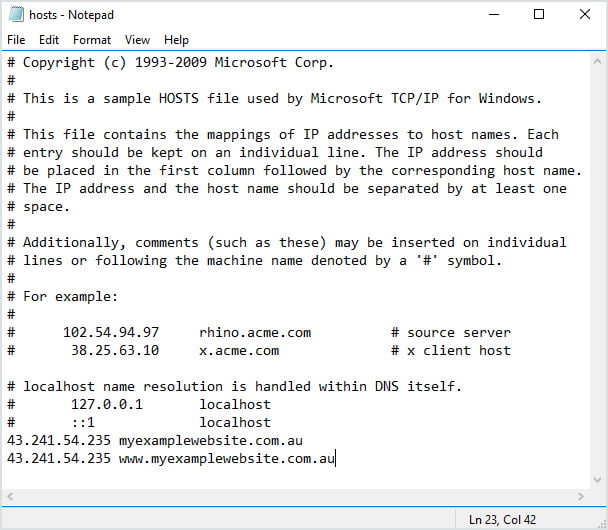
In the file that appears, you will need to input new entries just like the example provided at the bottom of the file in this screenshot. Use the following format: <IP Address> <space> <domain> <IP Address> <space> <www. domain>
5. Once you have added your entries to the file, navigate to File ? Save.
6.Once you have saved the file you can close the window, then visit your website in your favourite web browser.
MacOS X:
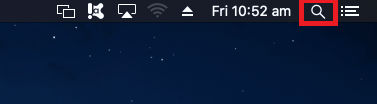
- Open Spotlight search by clicking on the search icon to the top right of the screen (or by using the Command + Space keyboard shortcut)
3. When the terminal Application opens, you will need to type “sudo nano /etc/hosts” (no quotes), then hit Enter
4. You will be prompted for your password, enter that then hit Enter again
5. A text editor will open within the Terminal window. Note: The cursor can only be controlled using the UP, DOWN, LEFT, RIGHT keys on your keyboard
6. Here you will input the new hosts file entries, following the example given in this screenshot
7. Once you have updated the file hit CTRL + O (the letter O not zero) on your keyboard, then hit Enter to save the file
8. Then hit CTRL + X to close the file
9. Once you have saved the file you can close the window, then visit your website in your favourite web browser (e.g. myexamplewebsite.com.au)